Showing posts with label Crafts. Show all posts

Wednesday, April 23, 2014

A Peacock Themed Wedding You Can Afford!

    
     About 2 years ago, my daughter mentioned something about a place called Pinterest.com where people put pictures of interesting things they wanted to refer back to. I took a look at her page and saw a few things that peaked my interest.

     With my daughter's wedding being planned, and having the theme of peacock feathers, I thought, well, I wonder what I can find on Pinterest. Holy Mackerel! There are thousands of pins regarding weddings - any kind and any place that you can look into. I found dozens and dozens of pins of peacock wedding cakes, peacock table decorations, peacock flower girl dresses, peacock bouquets, peacock you name it - what a treasure trove! As a fairly crafty person, I just knew I could duplicate many of the ideas and do it cost effectively. I started looking into some of the pins and while I didn't always duplicate them, they were a great jumping off point.

     The dress was found at  one of David's Bridal sales - someplace she never planned on going to, but was talked into at least looking and trying things on to find a silhouette she liked. This dress was a real surprise and had everything she was looking for.  She also took care of making the bouquets with her maid of honor, getting most of the supplies at Hobby Lobby.  She decided to have her bouquet all in avocado green and the girls in the rest of the peacock colors. Having been in a ton of wedding parties herself, she looked long and hard for a bridesmaid dress that could be 1. used again and 2. not expensive - she found these wonderful wrap dresses online at Target for $30 - how could you go wrong? I made the girls crystal bracelets to match the dresses and some hair pins.
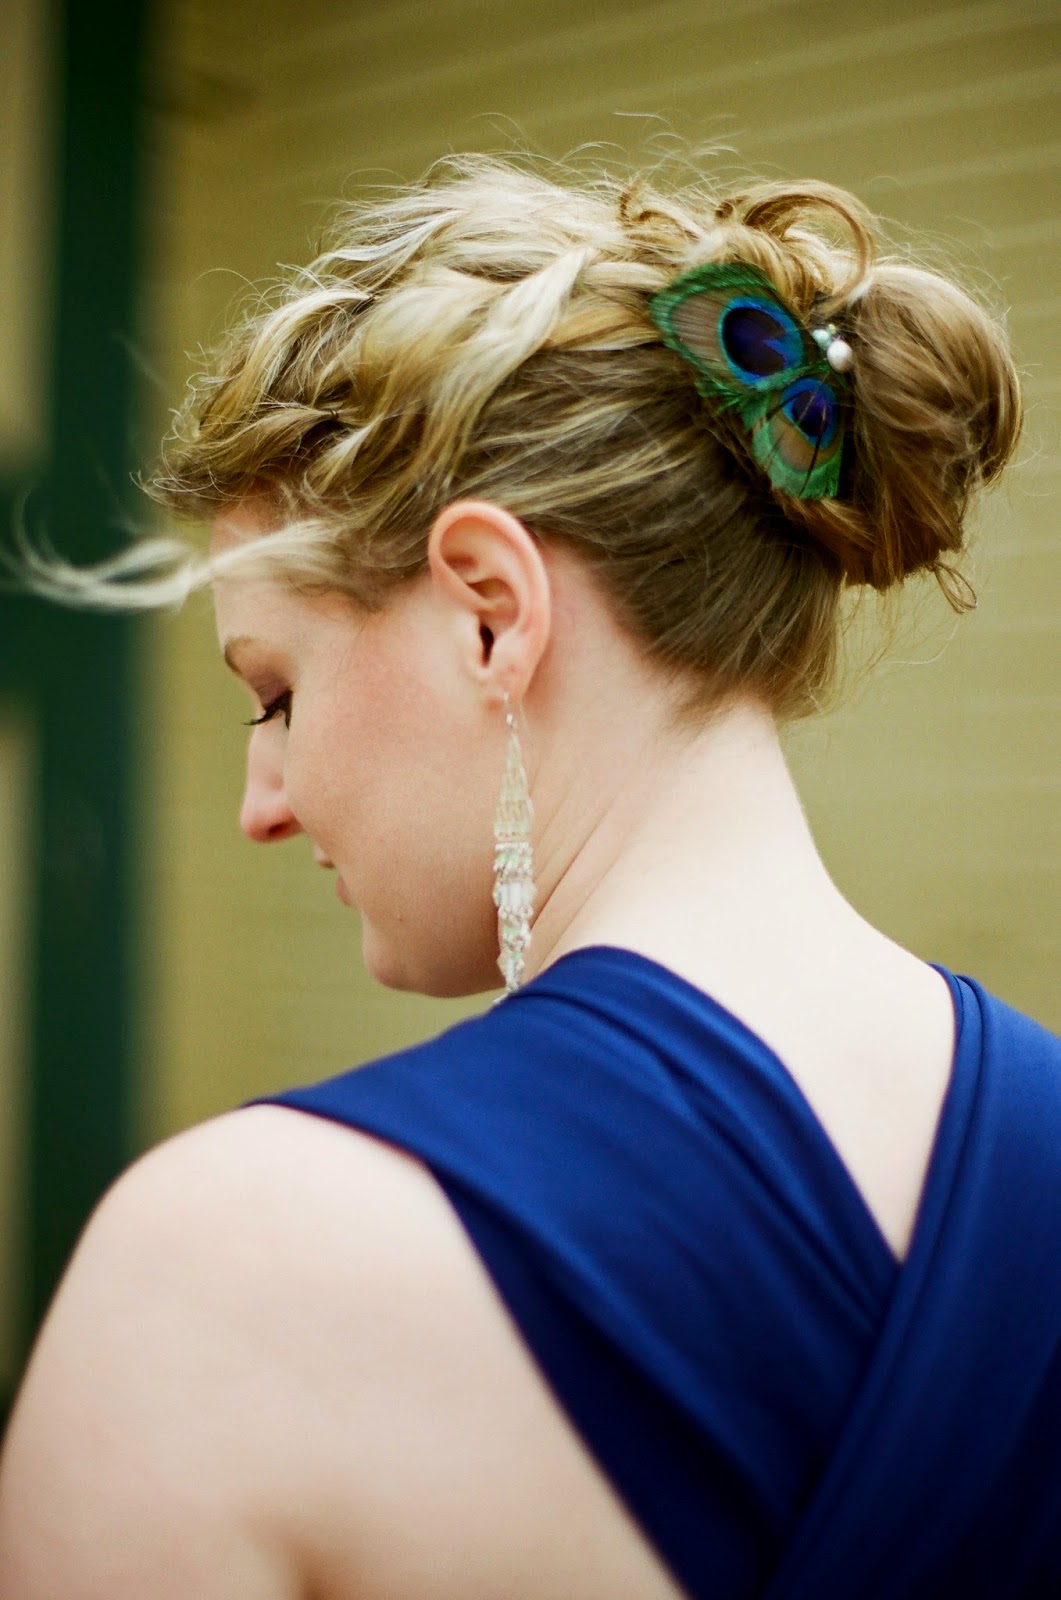
 My daughter made her headpiece as she wanted something that had a vintage look and bought the base piece and hot glued the feathers and veil to it. I think it was just perfect. 
  The next decision was what to put all the younger attendants in. She decided to have the three flower girls in multicolored tutus and i had lots of fun making them. It was surprisingly easy. Next were the peacock colored headbands which I made with stretchy crocheted headbands that matched the crocheted tops on the tutus. It was easy to sew the feathers on. The boys were easy to work with. Their mom bought cream colored shirts, black pants and peaked caps. I made them aqua vests and bow ties that matched all the colors in the tutus.


Two of the flower baskets I found on sale. The third one for the oldest girl was actually the woodland basket that was used for her mom's wedding. To unify things, I added ribbons of all the colors


For the church, I made pew bows from an Ivory tulle and ribbon and a peacock feather. The front row had a gold insert with a peacock colored ornament hanging form it, the others had simple crystals hanging. We put the head table centerpieces on either side of the altar and it looked beautiful

For the reception, we had blue napkins enclosed with a peacock and their names
The table decor was fairly simple - I found some lovely glitter tulle in blue and aqua and some 6 foot strands of winter berries in the same colors at JoAnns.We added some lights and the head table looked lovely.

For the actual table decorations, I went on freecycle.com and asked for vases - i scored 30 or more of them
that all looked the same! I went and cut some teasel and spray painted it aqua adding a little Martha Stewart magic with her cut up mylar sprinkles. I picked the spent lily shoots and spray painted them dark blue and added dark blue glitter sparingly. I picked some cattails and ordered peacock feathers inexpensively from  China. I put aqua water gems in the vase with a small waterproof light which looked really beautiful as the venue got darker in the evening.
For table numbers I made a simple holder out of a block covered in blue satin ribbon, some light green crystals and clear pebbles. Each table had a different photo of the happy couple's engagement photos
My daughter didn't want a full wedding cake and went with apple crisp with ice cream as the wedding was in the fall. I got to thinking and made a fake 2 tier cake from satin material and gems and then made a real top layer lemon cake with lemon filling - perfect for a Lemons wedding! The groom's sister made the chocolate groom's cake which had a Jayhawk on it - fitting for someone who went to the University of Kansas.
    I can't tell you how much fun putting all this together was. Having 9 months to plan, I was able to make use of all the 40% off coupons for JoAnn, Michaels, AC Moore and Hobby Lobby. Nothing was purchased at full price, yet everything looked beautiful. There is no need to go into debt to plan a beautiful wedding. There are still venues even here in New York that you can get for less than $25 a plate. If you do your own decorating, there is plenty left over for hiring a good DJ and photographer, something you don't want to skimp on. We had a young woman from our church video the day for $50 and 2 other girls babysat the young children so the parents could enjoy the day but were nearby if needed. We even brought a pack and play so they could be put down for naps - a really smart move according to the venue's owner.

If you have a wedding coming up and limited funds, I really recommend checking out pinterest.com for wedding ideas, photo ideas, decorations etc. Anyone can make many of these things and have the wedding of their dreams!


Wednesday, March 19, 2014

Making a March Madness Wreath


March Madness has begun! I know this because my son-in-law is a Jayhawk and the games have begun! I didn't really care for sports growing up - I basically played what I had to in high school and left it at that. My dad and brother are huge sports fans and I do remember them going to see the Knicks at Madison Square Garden one year and yelling themselves hoarse!

I visited Lawrence, Kansas, home of both the origin of the game of basketball and the Jayhawks during March Madness last year. I could not go anywhere without running into something Jayhawk. My daughter was being ordained at that time and some people actually came to the service decked out in Jayhawk clothing! I knew then that these people were serious about the game. I haven't a clue about brackets, but my son-in-law gives you an idea on his blog here: http://burtogram.wordpress.com/2014/03/18/57-the-ultimate-official-foolproof-cant-miss-strategy-for-winning-your-ncaa-tourney-bracket-pool/. I also find it funny that the University of Kansas uses the letters KU. The reason apparently is that the University of Kentucky already uses UK. However, then you have the actual Kansas State University which cannot use the already used KU and uses K-State - go figure!

I thought wouldn't it be great to make them a wreath to hang on their front door during the season. So, I went to a few craft stores to pick up what I needed. I always go to my four favorites (Michaels, JoAnn, Hobby Lobby and A.C.Moore) carrying a 40% off coupon - that way I can make things that don't cost an arm and a leg! Luckily these four stores are all in close proximity. Here is a list of what I bought:
2- 25 yard rolls of blue tulle (you use your NCAA college colors)
1 - 25 yd. roll of red tulle
1- 18" styrofoam wreath form
2 letters - K and U. I used 5" letters. You would of course use whatever letters your college uses.
I already had some florist wire, acrylic paints in red and gold, a spay can of clear paint and a hot glue gun with glue sticks.
1. Cut your blue tulle into 21" lengths
2. Cut your red tulle into 21" lengths.


3. Take your piece of tulle and fold it in half. Then take the looped portion and slide it under the wreath.
4. Take the cut ends and bring them over the top of the wreath
5. Pull them through the loop on the bottom and tug 
6. It should look like this
7. Continue doing this with the blue all around the wreath. Then gently open areas around the wreath to do the same with the red tulle. I had about 11 blues in each section. I placed 3 reds for every 6 blues and then after the next 5 blues placed 2 reds. This gave it a nice look that wasn't too matchy matchy.

8. Using a scissor, trim all the ends to 3" to give it a clean look
 

9. Paint the tops of your letters red - or whatever color your school uses. Let it dry and paint the sides the second or third color. KU is basically red and blue, but has accents of yellow because of the Jayhawk mascot. If you are unsure of your painting skills, you can use painter's tape to cover the area's needed.
9. Once they are dried, take 2 or 3 pieces of florist's wire, bend them in half and make 2 small circles in the bent area. This is so you have something for the hot glue to adhere to.

10. Take your hot glue gun and generously add glue to the back of the letters while holding the wire in place until it dries enough to hold, which should be only a few minutes. For placement, I knew I would have one letter higher than the other on the wreath, so I put my wires in 2 different places
11. Using the wire, firmly attach your letters by wrapping the wire around the wreath form
12. Add a ribbon to hang it with and there you have it!


Monday, December 31, 2012

Happy New Year!

Well, I can't say I am sorry to see 2012 go - other than the wonderful day my daughter got married, much of 2012 has not made it my best year yet - but here's to 2013 and better times.

I have a lot planned for the New Year - please bear with me as I learn about web pages, html, taking pictures and making this blog better! I have lots and lots of great plans and things to share with you from Event Planning for Weddings, Family Reunions and Class Reunions done on the "cheap" but with class, as well as home renovating (we have a 75 year old home that we are renovating), some genealogy tips and fun crafts and things to do with your kids. Of course there will be more baking as well. I love trying new and old recipes - especially ones from other countries!

So stay tuned! I should have a new blog with some wedding planning ideas later this week. Till then, enjoy your evening, be safe and 

                                 Happy New Year!